► 1/12th scale Tamiya CW-01 Lunch Box built and driven
► Upgrades over 1987 original
► One of the most entertaining RCs you can buy
Think of the Tamiya CW-01 Lunch Box and its Midnight Pumpkin sibling as the Caterham Seven of the RC car world. The Lunch Box was introduced way back in 1987, and despite some updated mechanicals and electrics along the way, is essentially the same as it’s ever been.
The CW-01 chassis shares components with the Hornet and Grasshopper buggies – both similarly old designs – but with a high-rise monster truck twist. At 1/12th scale, it’s a fair bit smaller than the 1/10th scale Tamiya Squash Van but still feels like a good size for the money you’re paying.
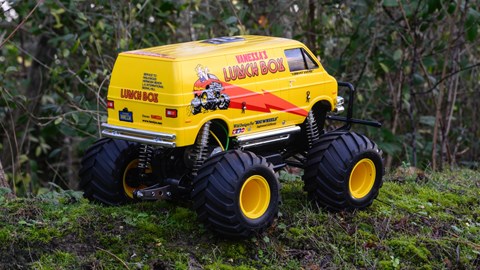
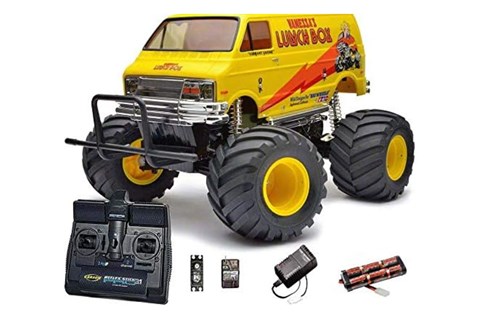
You have to build the Lunch Box up from a box full of parts and paint the shell for the classic experience, although a ready-built version is available. You get a motor and electronic speed controller (a far better solution than the mechanical speed controller of the original) included, but you’ll need to add your own radio gear and battery, not to mention the paint for the shell.
Read on to see how easy it is to build and paint, and how it drives once you’ve finished.
Tamiya CW-01 Lunch Box
Pros
- Easy chassis build
- Huge fun to drive
- Accessible pricing
Cons
- Body mounts can be fragile
- Hard to drive accurately
- Poor standard turning circle
Features
- Motor and speed controller included
- Radio, battery, charger and paint required
- Wheelies on demand, especially with a Lipo battery
- Swing-axle front suspension, motor directly mounted to live rear axle
The build
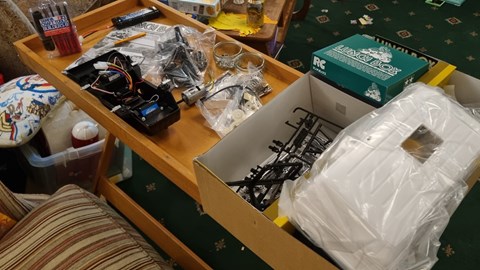
The Lunch Box comes with a four-way wrench for nuts and bolts and a 1.5mm allen key, but you’ll need a crosshead screwdriver (a standard Ikea one works pretty well), pliers, a craft knife and scissors. I’d recommend a Tamiya screwdriver set for the best purchase on the heads – it makes the build and maintenance so much easier.
Tamiya manuals are the clearest to follow in RC, especially when you’re putting together something as simple as the Lunch Box. What relatively few parts there are come in clearly marked bags for your hardware, with bigger plastic bits individually numbered on lettered sprues. These will need cutting off, ideally with side cutters, and any rough surfaces smoothing off with a sharp knife.
A bit of prep goes a long way. Read the manual before you start, get a few trays for the different hardware bags and charge the battery. You’ll need to centre the steering servo which requires power for a start, and you know you’ll immediately want a go when you’re done.
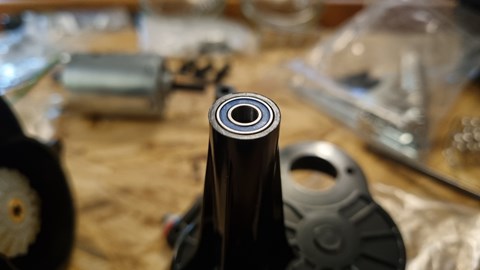
Screws, nuts and threaded rods are shown lifesize on the left margin of the manual for double checking and it’ll tell you where to grease and glue. As with all my radio-controlled cars, I’ve fitted a set of metal ball bearings instead of the solid metal and plastic bushes. The bearings allow the axles, gears and steering mechanism to run smoother, improving performance, durability and runtime. They’re less than £10 for the Lunch Box and are a sensible first upgrade.
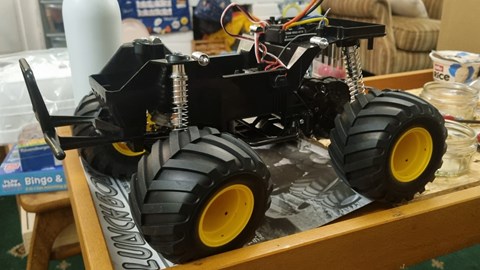
The build itself is easy, and there are a few clear stages that allow you to divide the build up over a few evenings. First up is fitting the chrome body mounts and the electronics to the main chassis, followed by building the combined rear axle and gearbox. Just one gear sends power from the 540-sized motor to the rear differential, so a large part of the build is completed relatively quickly.
Next up is mounting the axle to the chassis on the flashy but not particularly effective chrome shocks, building the steering links and fitting the battery holder and front bulkhead. A final push to fit the front suspension, wheels and tyres completes the chassis, leaving just the body to do.
I find these hard plastic bodyshells much harder to finish well than the see-through Lexan shells that are more popular. The Lexan shell itself acts as a lacquer, giving a great finish unless you really mess up the spraying. A hard shell will require a good, even coat, some wet sanding, lacquer then polish to get a really good finish, and you’ll need to hand paint a few details as well.
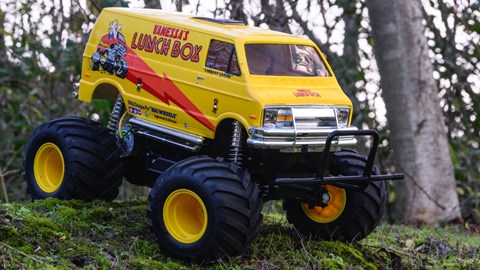
My efforts look fine in photos, but the brush painting of the rear numberplate and window surrounds, not to mention the chrome handles didn’t go so well. At least the front indicators and side markers are passable. I also made the mistake of giving the shell a final coat of yellow with a nearly empty can, the spatter doing nothing for a smooth finish.
I could spend some time rubbing it back and giving it another coat of paint from a fresh can, but I’m not too worried. It still looks good on the shelf and on the move, especially with the few pre-cut stickers applied. Besides, I just know it’s going to end up scuffed and scratched from running. Maybe I’ll do a better job on its inevitable replacement.
The drive
I’d say the driving experience is similar in spirit to another modernised classic I’ve driven, the previous-generation Morgan three-wheeler. Technically, it’s not very good, but that’s what makes it so much fun.
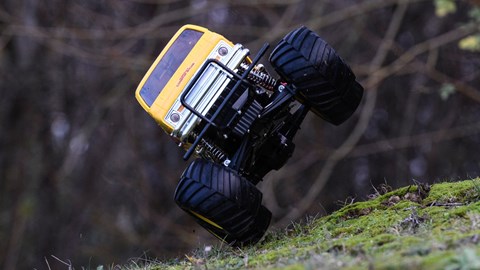
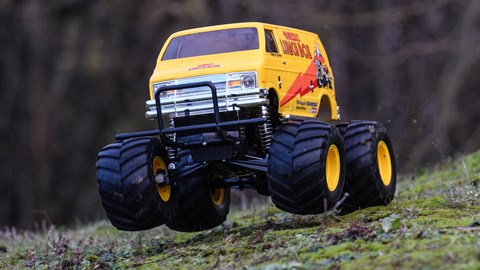
Let’s start with the positives. You’ll be using the wheelie bar plenty thanks to the light nose and battery that’s mounted towards the rear of the main chassis. It’ll pick up its nose happily from a standstill with a decent 7.2v Nimh battery, and violently bounces onto the wheelie bar if you’ve got a 7.4v Lipo.
More careful throttle control can net impressive distance on the back wheels before the front eventually bounces down. Bounce is the right word as there’s no damping inside those chrome shock bodies, just a bit of grease on a screw sliding through the chassis.
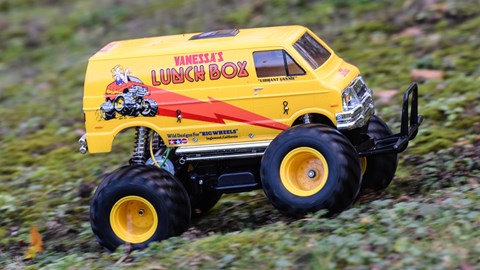
The front is very stiff as standard with the swing axles generating plenty of positive camber. The high ride height also limits how far the servo can turn the front tyres, giving a wide turning circle. Braking as you corner does help, but ultimately you need to limit front shock down travel with some rubber tubing and ideally relocate the servo.
Unsurprisingly the rear shocks are just as bouncy so even with the squishy tyres absorbing a few impacts, you spend plenty of time in the air over rough surfaces. It sounds chaotic, and that’s because it is.
But this chaos is what makes the Lunch Box so much fun. Watching it hop and skip over rough ground at less than 15mph is hilarious, as are the numerous tumbles and rolls you’ll inevitably have. Besides, there’s just enough control to stop you getting frustrated. It’ll track straight enough, and sliding the back around under braking not only helps you turn, you’re almost guaranteed to get going again with a wheelie.
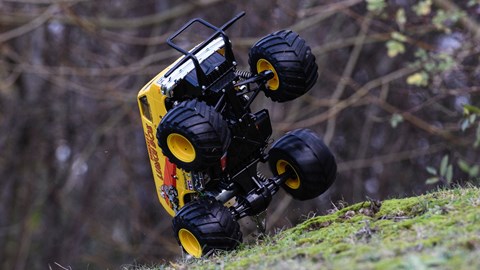
The heavy shell means rollovers are frequent, and road rash is to be expected if you venture onto tarmac. Two-wheel drive means its far better speeding over rough terrain than trying to crawl through it, although that’d be the case with rivals, too.
There’s a few upgrades available from Tamiya, including oil filled shock absorbers, a metal motor mount and gear cover, and faster motors. Going aftermarket gives far greater choice, with proper double wishbone front suspension, better steering setups, improvements to the rear axle mounting and springing, alloy body mounts, and even a full alloy chassis.
I’d be tempted by some oil shocks, alloy body mounts and possibly some of the steering mods, but you’ll have plenty of fun with a stock truck, especially with a little more power. Just don’t get too greedy, a brushless system can make a Lunch Box or Midnight Pumpkin almost undrivable.
Durability
Like almost all Tamiyas, the CW-01 is primarily constructed of tough but flexible plastic. This is great for beginners as the car can take a good few hits before you’re likely to break something. There’s also no chance of bending a chassis in an impact.
Unfortunately, the chromed body mounts are made of a harder, more brittle plastic that will snap if you crash hard enough. Alloy replacements are cheap upgrade that’ll solve that issue. The small springs that help locate the rear axle are also weak. You can still drive it when they snap, so many put up with the more twist-prone axle (I certainly did when I last owned a Lunch Box. Alternatively, upgrades such as the fifth shock mod (Google it) fix the issue permanently.
Other things to look out for are the aluminium pinion which wears over time (look for teeth resembling saw blades). A steel replacement is cheap and will prevent this happening. Build without bearings and you’ll also find the axles and shafts will get wobbly over time as the plastic and brass bushes wear.
Any downsides?
It’s never going to be a precision handler or amazing jump truck, and it doesn’t take much to overpower the chassis. The gearbox isn’t the issue here, you just can’t use anywhere near full throttle with a high-power brushless system without the Lunch Box flipping.
Price and competition
Expect to pay just over £100 for just the kit, or around £200 for everything you need to get going. That makes it one of Tamiya’s cheaper kits, if not the cheapest option for 2WD monster trucks. A 1/10th scale Arrma Gorgon is usefully cheaper and comes ready to run.
It’s also much faster, handles better, and is far happier with big power. You do miss out on the Lunch Box’s detailed shell and the fun of building it from scratch, though.
Verdict
Perhaps the best word to describe the Lunch Box is silly, and I love it for that. There’s a good reason it’s been around for nearly 40 years, and it isn’t just nostalgia. Because of the rudimentary suspension, questionable weight balance and simple driveline, it punches way above its price and capabilities when it comes to fun.
Despite being a monster truck, it’s not too big and therefore easy to find space for in the boot of your car, and the oversized tyres mean you can run on a huge variety of surfaces, even the beach. The Lunch Box really is a classic RC, appealing to newcomers to the hobby or experienced hands looking for some retro fun. No RC collection is complete without one.
5/5
Ratings:
Driving: 5.0
Building/maintaining: 5.0
Value for money: 4.0
Overall: 5.0
Specifications:
Size: 1/12th, length 385mm, width 290mm, height 225mm
Weight: 1560g (no battery)
Chassis material: Plastic
Power: 7.2v NiMh or 7.4v LiPo
Motor type: 540 brushed, 27T
Driven wheels: Two, gear drive
Top speed: 10-15mph
Tamiya Midnight Pumpkin

The same chassis with a classic 50s pickup truck shell.
Arrma Gorgon

A more capable ready to run for similar money.
DeeRC Tachyon
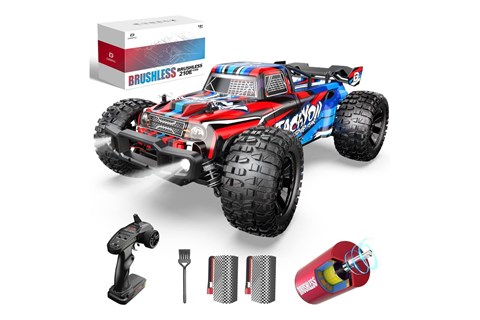
An excellent value brushless 4WD alternative.
Who tested the Tamiya CW-01 Lunch Box?
Alan Taylor-Jones is the new cars editor for CAR magazine, and also Parkers. He’s been writing about cars professionally since 2015 but has been obsessed with them since not long after birth. When he’s not sampling the latest and sometimes greatest cars, he’s got his hands full with a young family and menagerie of pets. Even so, he still finds the time to have a play with RC cars and Hot Wheels.
How the product was tested
We built the kit from scratch using Carson radio equipment and a 2100mah battery supplied by Tamiya UK. Once constructed, we drove it on a flat tarmac carpark and a bumpy grass area. As the ESC is LiPo capable, we also took it for a blast on a suitable 2S pack to see what the performance difference was.