► 1/10th scale Tamiya Wild One build and drive review
► Oozes retro charm and desirability
► More fun than most of my brushless buggies
Nostalgia is big business these days – whether it’s the tenth Batman reboot or the Porsche 911 reimagined by Singer, you don’t need an MBA to see that taking something once-loved and updating it with modern tech is an oft-trodden path towards profit.
The other thing about nostalgia though, as the saying goes, it that it’s not what it used to be. In the case of vintage RCs that is absolutely true – and things have moved on significantly since the mid-1980s when the Tamiya Wild One was initially launched.
Yes, the big shock absorbers, roll-cage mounted motor, and hooligan temperament of the original car still stir my soul, but the thought of faffing about with a mechanical speed controller and lethargic NiCd battery do not.
And that’s assuming you can find a 1980s model, or the desire to spend several hundred pounds on one, when you could buy a modern, brushless buggy for the same money instead.
But if you could capture the old car’s style and charm, with in a load of 2025-appropriate electronics, that’d certainly be something, wouldn’t it?
Tamiya Wild One
Pros
- Fun and challenging build
- Looks absolutely epic
- Still fantastically fun to drive
- Great for beginners too
Cons
- Restrictive battery compartment
- Exposed battery cables
- Engine position is potentially vulnerable
- Brushed motor isn’t the fastest
Features
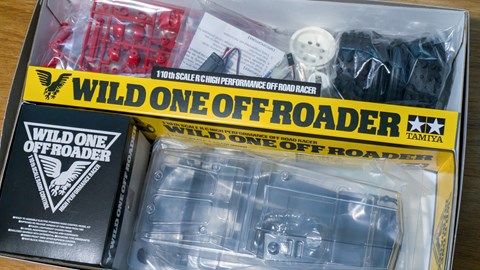
- Electronics supplied – motor and speed controller
- Purchase a transmitter and receiver separately
- You’ll also need some paint
The build – FAV chassis
Luckily reimagining this RC car isn’t anywhere near as complicated as sticking a Tesla drive unit in an old Mini, for example, because there’s plenty of space in the Wild One’s FAV (Fast Attack Vehicle) tub chassis for modern radio gear, servo and speed controller.
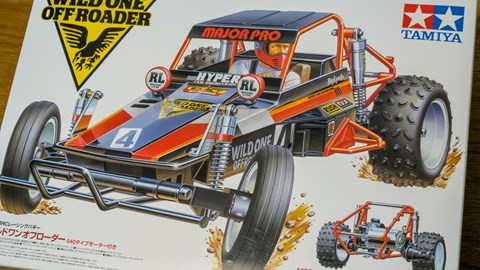
Before diving into the build, I had to pause at the beautiful box art, depicting the fictitious racer Ray Lynch doing some serious driving-while-looking-out-the-window, plus some cutaway diagrams of the car itself. It’s all very evocative and reminiscent of the excitement of unwrapping a new RC on a Christmas morning. If you saw one on a shelf it’d be hard to leave it there.
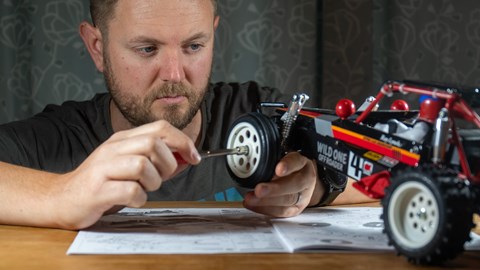
I’ve built a fair few Tamiya TT-02s recently (I think I’m up to six now, my son races them) and in contrast the Wild One seemed a bit more complicated and fiddlier. This is partly down to the retro design (which hasn’t changed since the 1980s) but also, I suspect because it wants to look scale, and that always makes things more complicated.
Obviously, this all adds to its visual appeal but I’m pointing it out because it’s worth making sure you’ve got some time to commit to it. This isn’t one you can throw together in an afternoon, you need to spend a bit of time getting it right.
It has a tub-style chassis that you screw and bolt all the parts to, so from that respect it’s not a million miles from a TT-02, but the first major difference is the trailing arm suspension rather than double wishbones.
This requires a hefty metal front axle to be constructed first, and all of these parts are pleasingly chunky and robust looking. This is the end of the car that usually ends up hitting the tree first, of course, so that’s good.
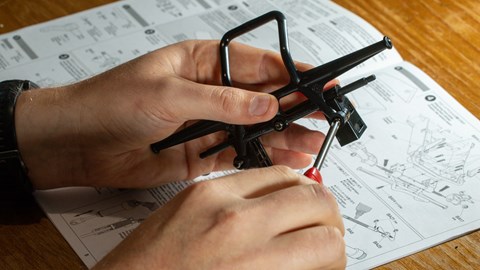
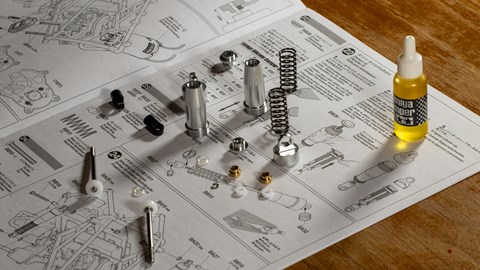
The suspension arms connect to the very fetching metal (and oil filled!) shock absorbers and then these are bolted to the body via those iconic silver uprights, which look like aluminium but are in fact plastic. You get a decent swing of wheel travel from this set up, but the suspension springs sound a bit twangy.
Next you repeat a similar sub-build on the rear of the car before attaching the red rollcage, housing the motor, which in this case is a standard Mabuchi silver can. Tamiya sometimes bundles its faster Torque/Sport Tuned motors in with kits and I thought it was a bit odd that the Wild One didn’t come with something a bit more premium, but I suppose it means the speed on offer is 1980s-spec.
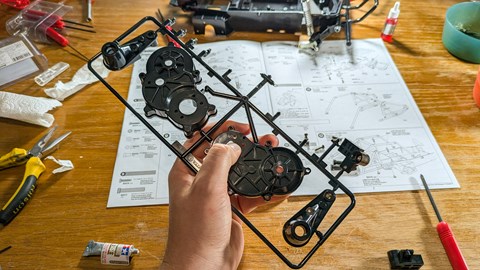
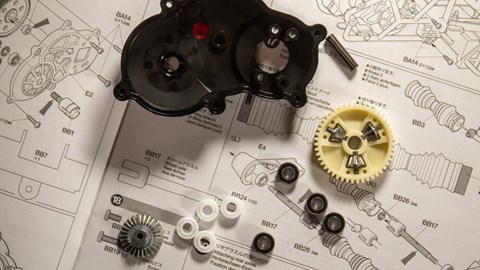
The motor actually bolts straight onto the gearbox and diff housing, a bit like in a DT-03, and this was the first point in the build where I had to open my bag of ball bearings. These aren’t standard in the kit (you get plastic and brass bushings instead, see below) but are a no-brainer upgrade, and much easier to install as you build rather than having to take it all apart afterwards.
Putting this section together is a bit fiddly, and the instructions call for a length of tape to hold one of the gearbox outdrives in place while you put the other side together. It looks great bolted up though, especially with the red plastic ‘oil’ cover in place.
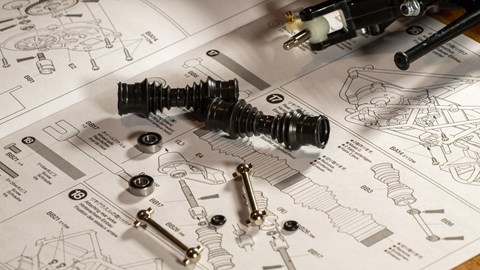
Next up are the rear axles and these come with some incredibly 1980s-looking gaiters, to protect the wheel axle and driveshaft joint. These are also slightly faffy to construct – the dogbones feel too big to insert into the rubber gaiter and I was worried I was going to tear it. But it all worked out alright in the end.
There’s a choice of pinion gears to attach to the motor, I picked the tiny 15T because I wanted decent acceleration off-road, and then it’s onto building the rear shocks. These are a different design to the fronts and have a much shorter spring, but due to the geometry of the linkage you get the same amount of wheel travel.
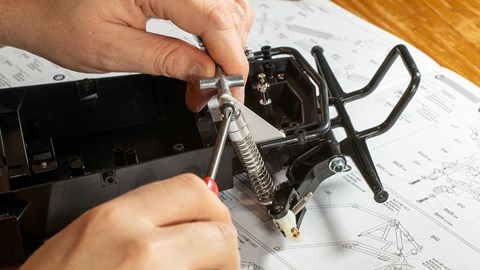
The hardware required to attach these to the rollcage is a good example of how much more there is going on in this build. In a TT-02 the shocks are held in place by a single screw into the shock tower, or a 5mm ballhead if you’ve got CVAs.
Here you need to insert a bushing into the top shock mount, then a bolt, a short brass pipe, a washer and finally a nut to hold it in place. That amounts to quite a bit more hardware.
Next up you have to install your electronics and construct the steering links, by screwing a plastic socket onto an adjuster rod. The thread is very fine and I’m a bit worried about pulling it through if the wheel gets caught on something.
The servo, receiver and ESC all have a tonne of space in the tub so you can choose where you want them to go. This kit contains Tamiya’s newer ESC, which looks a lot like a Hobbywing one I’ve got in another kit, and allows with NiMH or Lipo batteries, which is excellent news.
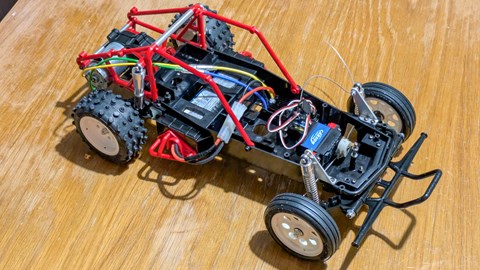
Sadly the on/off switch isn’t compatible with the rubber switch cover, which screws into the bottom of the car, allowing you to turn it on and off without removing the body. So I’ve just left it in the “on” position and turn the car off by disconnecting the battery. I know you’re not really supposed to do this.
The build – bodywork
Now, I fell into the trap of thinking this would be quite simple, because the body is just one colour (black) with the red/yellow/silver elements being applied afterwards in sticker form. First you have to cut the pieces out, and it’s worth studying the Lexan body several times to make sure you’re cutting in the right place. It looks like it’d be quite easy to accidentally slice through the roof section, for example.
That bit done, I moved onto the driver figure, which gave me a bit of a headache. Most of this piece is black, except for our mate Ray, who has white overalls.
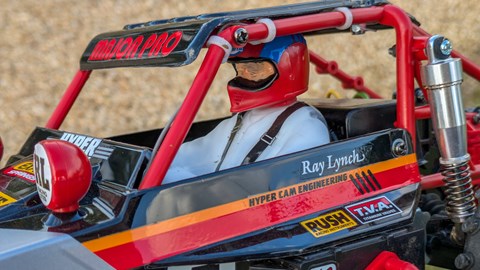
My local model shop actually suggested painting the outside of the figure instead but I Ignored this and tried to mask him off so I could paint the two halves separately, but it didn’t exactly go to plan, as you can see from the overspray on the shoulder of his race suit.
Eventually I conceded – painting the inside of the figure white and then brushing the outside of the cockpit black meant I (mostly) had the right colours in the right place. He does have oddly enormous hands though, but I don’t think that’s my doing.
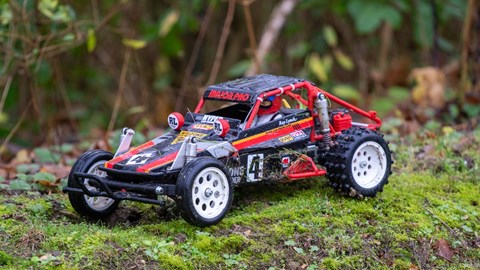
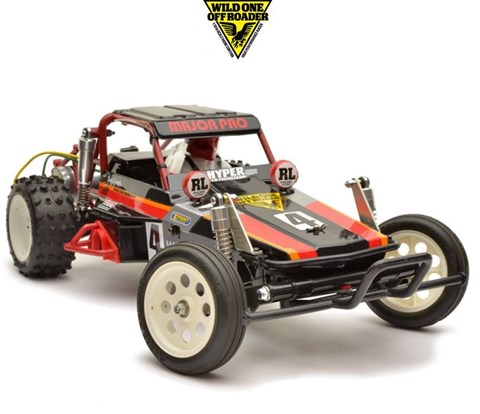
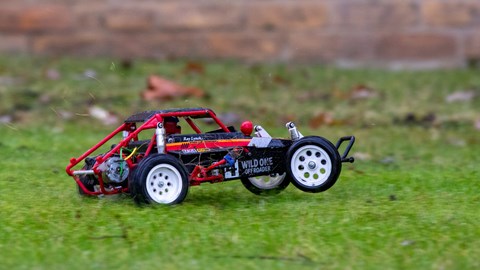
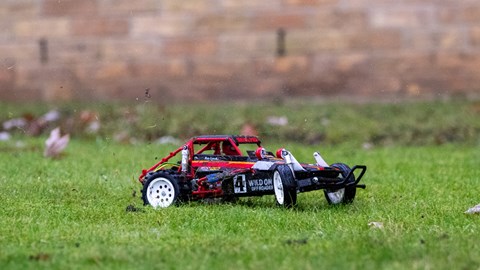
The stickers were actually really fun to apply and I think I did a pretty good job (feel free to disagree in the comments) and overall the car looks absolutely awesome, I’m really pleased with how it came out and all the little details that make it look like a scale model rather than a toy.
The drive
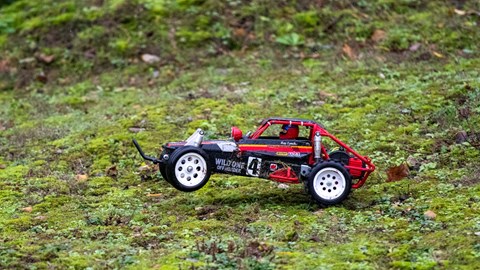
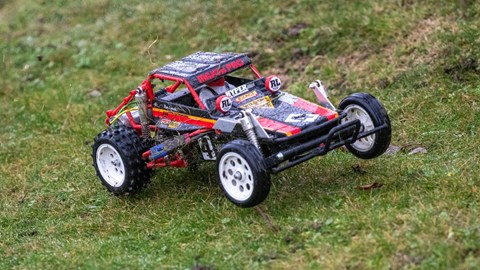
This is where opinions diverge because key to the Wild One’s appeal is its looks (and it does look immense) and that might lead you to sticking it on a shelf and leaving it there. I think RCs are for driving though, and in the interest of science I decided to take it to a grass racetrack for its first proper shakedown.

In all honesty I didn’t imagine I’d be walking away with any trophies but I was very surprised by how well it held its own, and more importantly, how much fun it was to drive competitively. The biggest shock of all however was just how little interest I have in hopping it up. None of my RCs are standard – upgrading them is probably my favourite part of the hobby, but the Wild One is absolutely fine as it is.
The handling was actually pretty good for a car so focussed on being retro and scale – two characteristics that don’t often lend themselves to pin-sharp responses. The springs seem oddly stiff and there’s not a lot of compression damping. Conversely the rebound damping is quite slow, so overall it’s a little boingy on rough ground and gets unsettled on repeated bumps. But I think that’s all part of the appeal. It’s supposed to be a little wild.
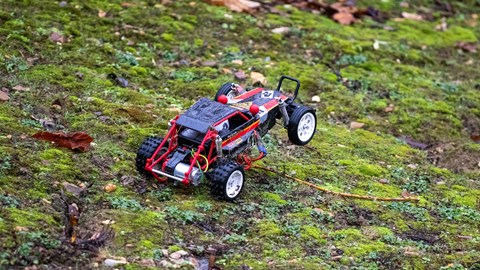
It does its best work on short grass, gravel, or compacted sand (although make sure you clean out the driveshaft boots afterwards) with tarmac best avoided really, unless you’re happy turning the tyres into dust. Which I’m assuming you are.
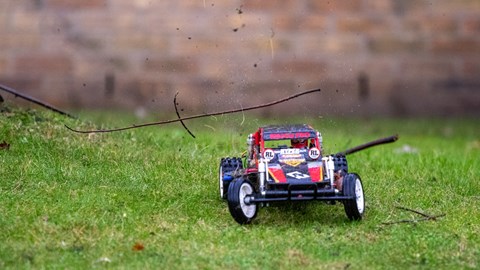
With the motor so far back in the chassis you won’t be surprised to hear that the Wild One likes to wheelie (although not as much as Alan’s Lunch Box) and consequently trying to turn under power is pretty futile, so you want to feather the throttle until the front of the car is well and truly pointed towards the corner exit before getting back on the gas.
I would definitely recommend gluing the tyres if you do plan on driving the Wild One quickly (whether that’s on the racetrack or elsewhere) because they have quite a lot of sidewall and like to detach themselves from the wheels, sometimes quite spectacularly. Do this before they get full of mud, it’s much easier.
Similarly, I found the underslung battery had a habit of ejecting itself (the tray holding it in is only secured with a body pin) so it’s worth using a more secure pin than the one that comes with the kit if you’re going to use it on rough ground.
Durability

Within minutes of taking control my daughter crashed it into a chain link fence, and I watched as the car went one way and the front left wheel went the other. I was worried the threads had been pulled out of the steering linkage but actually the only thing missing was the metal shaft that holds the wheel hub into the suspension arm. So that was a simple fix.
Otherwise, it’s been pretty bombproof – I must admit I have been treating it quite carefully, but it’s been sent off a load of kerbs and also a small ramp at the skatepark and appears to have survived. In fairness, this is no basher, but it should be durable enough for six-year-olds to pilot without fear, otherwise what’s the point?
Any downsides?
Other than the on/off switch not fitting into the cutout in the tub, the underslung battery means there’s an exposed cable running up the side of the car (see below), which doesn’t look very scale. It does look very 80s though, so I’ve forgiven it.
It’s a bit fiddly getting the bodywork on and off and although the Wild One can share a NiMH battery with my TT-02 cars, the Lipo I use in the latter won’t go in the former, which is a bit odd. I’d like to use a Lipo for better run times, especially as the ESC already supports this, but it looks like I’ll have to find a shorter pack.
Finally, one of the last stages of the build requires you to thread a bolt through the roof and into a little plastic red nut. This was such a fiddly job I nearly ended up giving up building RCs. Leave a comment below if you also struggled with this step.
Price and competition
I also think it’s surprisingly good value for money, when you think about it. There’s an original, boxed Wild One on eBay now at £300, and I’ve worked out that with inflation, that’s what the 1980s car would cost if it was on sale these days. So, paying less than £200 in 2025 for the significantly improved modern version is a steal.
If all you want to do is blast around off-road, an FTX Tracer truggy is a significantly cheaper purchase mind you. It doesn’t look as cool and you don’t get to build it, but with four-wheel drive and everything you need in the box for £74.99, it’s a better value option. It’ll also be cheaper to repair when you break it.
That car is a smaller scale and a slightly different bodystyle though – if you want a direct 1/10th buggy rival then something like the Maverick Phantom XB is a better bet, at £109.
Verdict
That said, I really enjoyed building, driving, and racing the Wild One. It’s actually given me a fresh perspective on the hobby in general – you don’t need the fastest or best handling car to have a good time, nor do you need to immediately upgrade the motor or shock absorbers to find that elusive tenth of a second.
That’s extra impressive when you consider that aside from electronics, this is essentially the same design as the 1980s car. I was also launched in that decade, and I am well overdue a reboot. If you weren’t around for the original then look up the TV adverts from the time on YouTube and then tell me you don’t want one.
But, if like me you yearned for a Wild One when you were six years old and never got it, it’s never been cheaper to buy one. It’s not really a question of do you want this Tamiya, more can you afford not to?
5/5
Ratings:
Driving: 5.0
Building/maintaining: 4.0
Value for money: 5.0
Overall: 5.0
Specifications:
Size: 1/10th, length 425mm, width 225mm, height 140mm
Weight: 1.7g (no battery)
Chassis material: ABS plastic
Power: 7.2v NiMh or 7.4v LiPo
Motor type: 540 brushed, 27T
Driven wheels: Two, gear drive
Top speed: 10-15mph
Who tested the Tamiya Wild One?
One-time New Cars Editor for Parkers and Car Magazine, Adam now heads up the content commerce team, which tests and reviews products for brands across Bauer Media’s digital portfolio.
He joined Parkers in 2015, having started working life as a newspaper reporter (who wrote about cars for the features team while his editor wasn’t looking) and blogging about car news and journalism.
Since then he’s contributed road tests and reviews to both Parkers and CAR magazine, as well as other titles in the Bauer family, The Telegraph, and on-screen via YouTube.
How the product was tested
I built and painted this car (with the addition of ball bearings) using the kit supplied by Tamiya, with Carson radio equipment and a NiMH battery. It’s been raced at a grass track, bashed at the skatepark, and skidded around the Bauer car park in the hands of fellow RC enthusiast Alan Taylor-Jones.